React recently announced the release of version 16 with long standing feature requests including error boundaries, fragments, improved server-side rendering and more. Error boundaries are especially useful so that an error in one small part of the UI doesn’t break your entire application. Instead, it’s better to contain those errors to the affected components and recover gracefully.
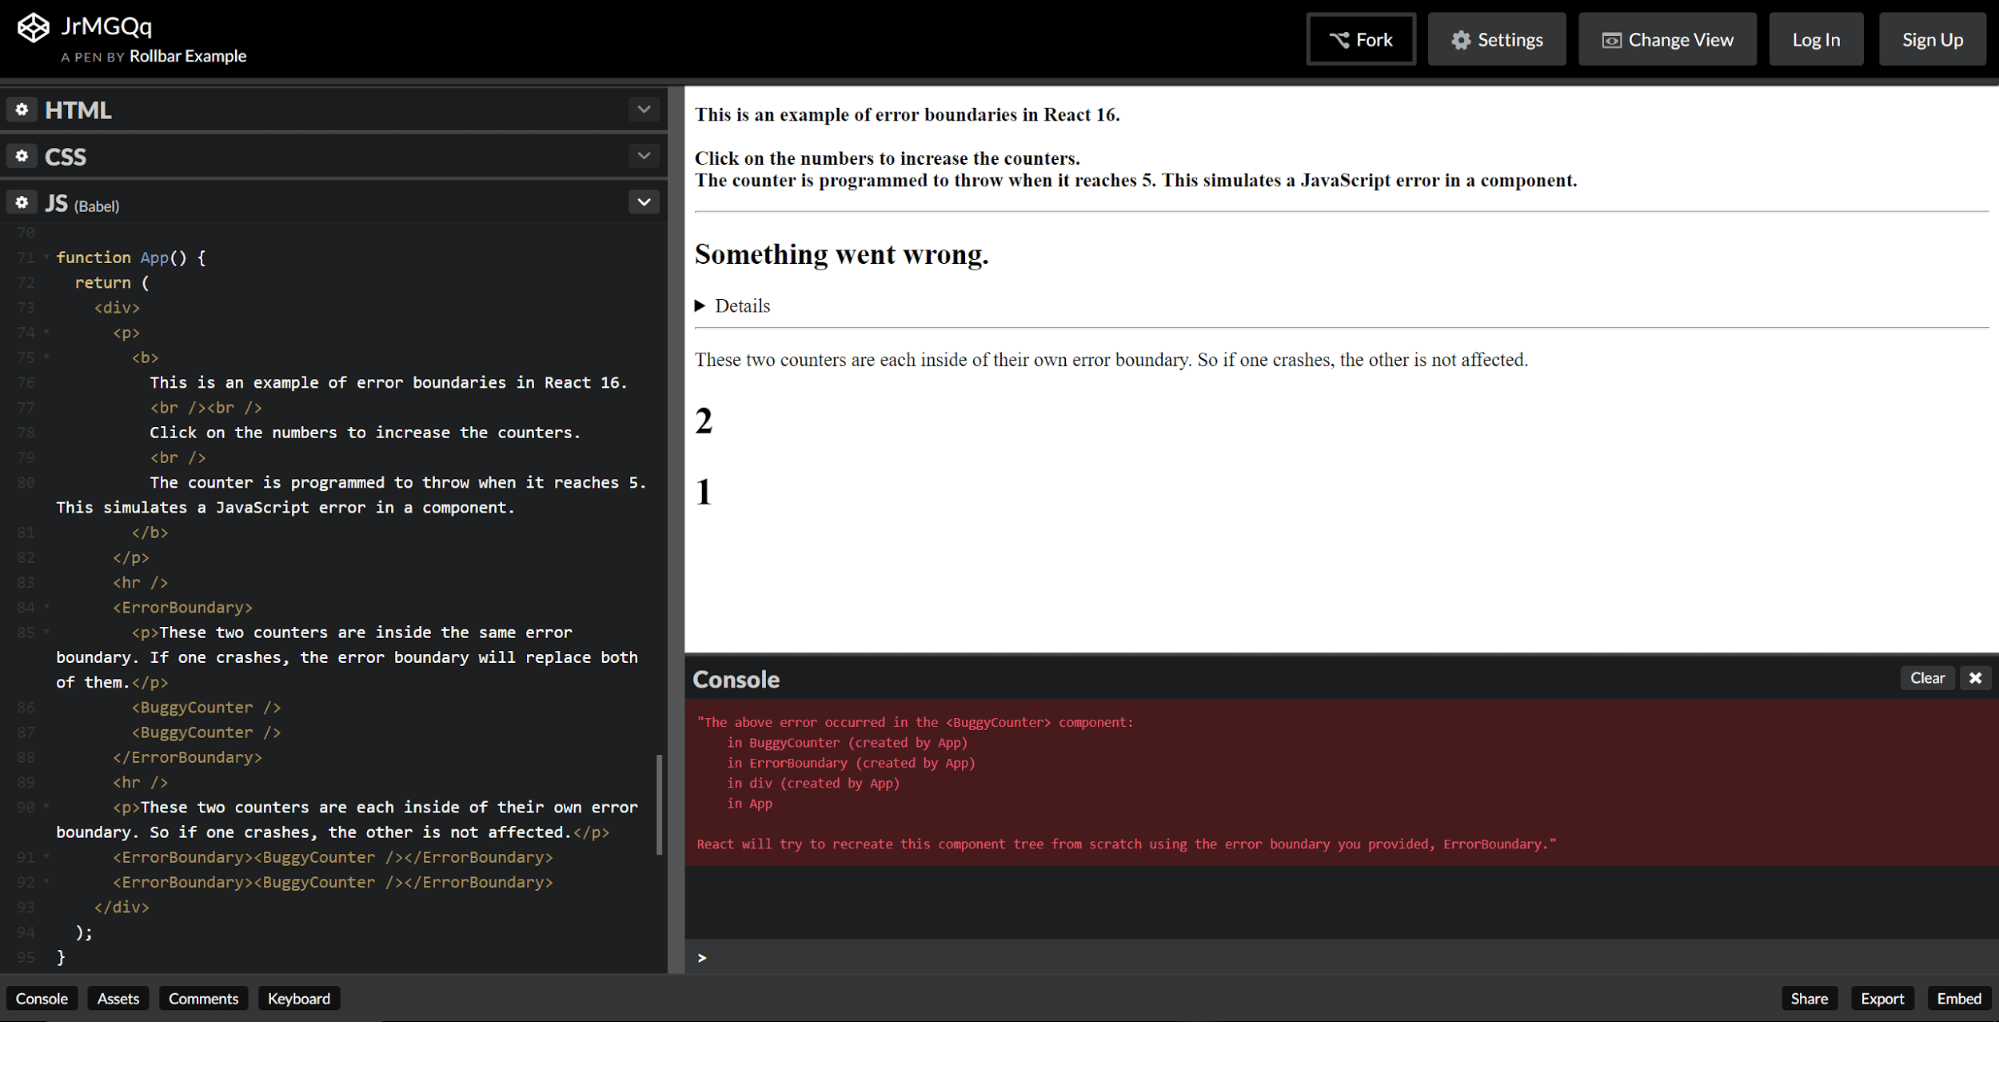
JavaScript error logging. When you open this page, you can activate an error boundary by clicking at least five times on the counter. You will then see the error message “Something went wrong.” Let's dive deeper into this example to learn how error boundaries work.
What are error boundaries?
Error boundaries are React components that catch JavaScript errors anywhere in their child component tree. They can log errors and display a fallback UI to replace the component tree that has crashed. They are similar to try-catch statements in your code, but surround page elements instead.
An error boundary is a React component with a componentDidCatch(err, info) method. Any errors occurring in a component tree get reported up to the nearest error boundary’s componentDidCatch function. Note that error boundaries only catch errors in the components below them in the tree. For simple apps, you can declare an error boundary component once and use it for your whole application. For more complex applications with multiple components, you can have independent error boundaries to gracefully recover each part.
You can also report these errors to an error monitoring service like Rollbar. This will give you the ability to track how many users are affected by errors, find what caused them, and ultimately improve your user experience. We’ll show you a working example of how to do this at the end.
How to implement React error boundaries
Here are some simple steps describing how to implement them in your code:
-
Create a component class that extends a React Component and passes the props.
-
Add a
componentDidCatchandrendermethod as shown in the below example. ThecomponentDidCatchmethod allows you to catch the error, and change how the component is rendered. For example, you can display an error message like “Something went wrong!”class ErrorBoundary extends React.Component { constructor(props) { super(props); this.state = { error: null, errorInfo: null }; } componentDidCatch(error, errorInfo) { // Catch errors in any components below and re-render with error message this.setState({ error: error, errorInfo: errorInfo }) } render() { if (this.state.errorInfo) { return (Something went wrong!); } return this.props.children; } } -
Add your new component in HTML, surrounding the parts you would like to include in your error boundary. In this example, we are adding an error boundary around a buggy counter component.
Adding Rollbar to React error boundaries
For real-world production applications, it’s important to monitor errors so you understand your user’s experience. If your application is breaking, you don’t want to lose customers or have them complain on app reviews or social media. It’s much better to monitor those production errors so that you’re the first to know, and can fix the issue before more customers are impacted.
Thankfully, it’s pretty easy to add Rollbar tracking to your React error boundaries. We will show you how:
-
Notice the first part of our JavaScript code, which configures and loads Rollbar. You can find the full details on how it works in our JavaScript documentation.
var _rollbarConfig = { accessToken: "3cda8fbafbfe4a6599d1954b1f1a246e", captureUncaught: true, captureUnhandledRejections: true, payload: { environment: "production" } }; !function(r){function o(n){if(e[n])return e[n].exports... -
Add Rollbar error tracking to the error boundary’s
componentDidCatchmethod.componentDidCatch(error, errorInfo) { Rollbar.error(error); // Send it to Rollbar! } -
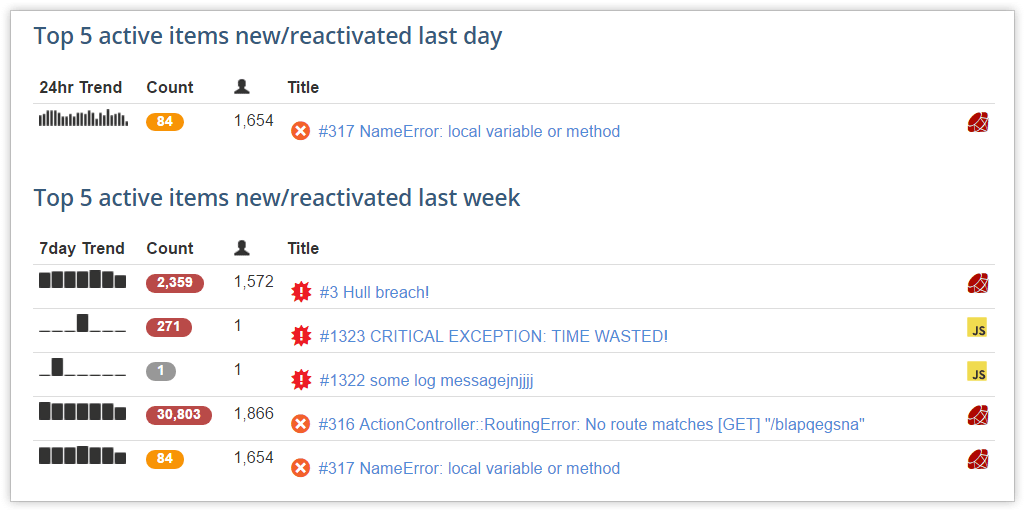
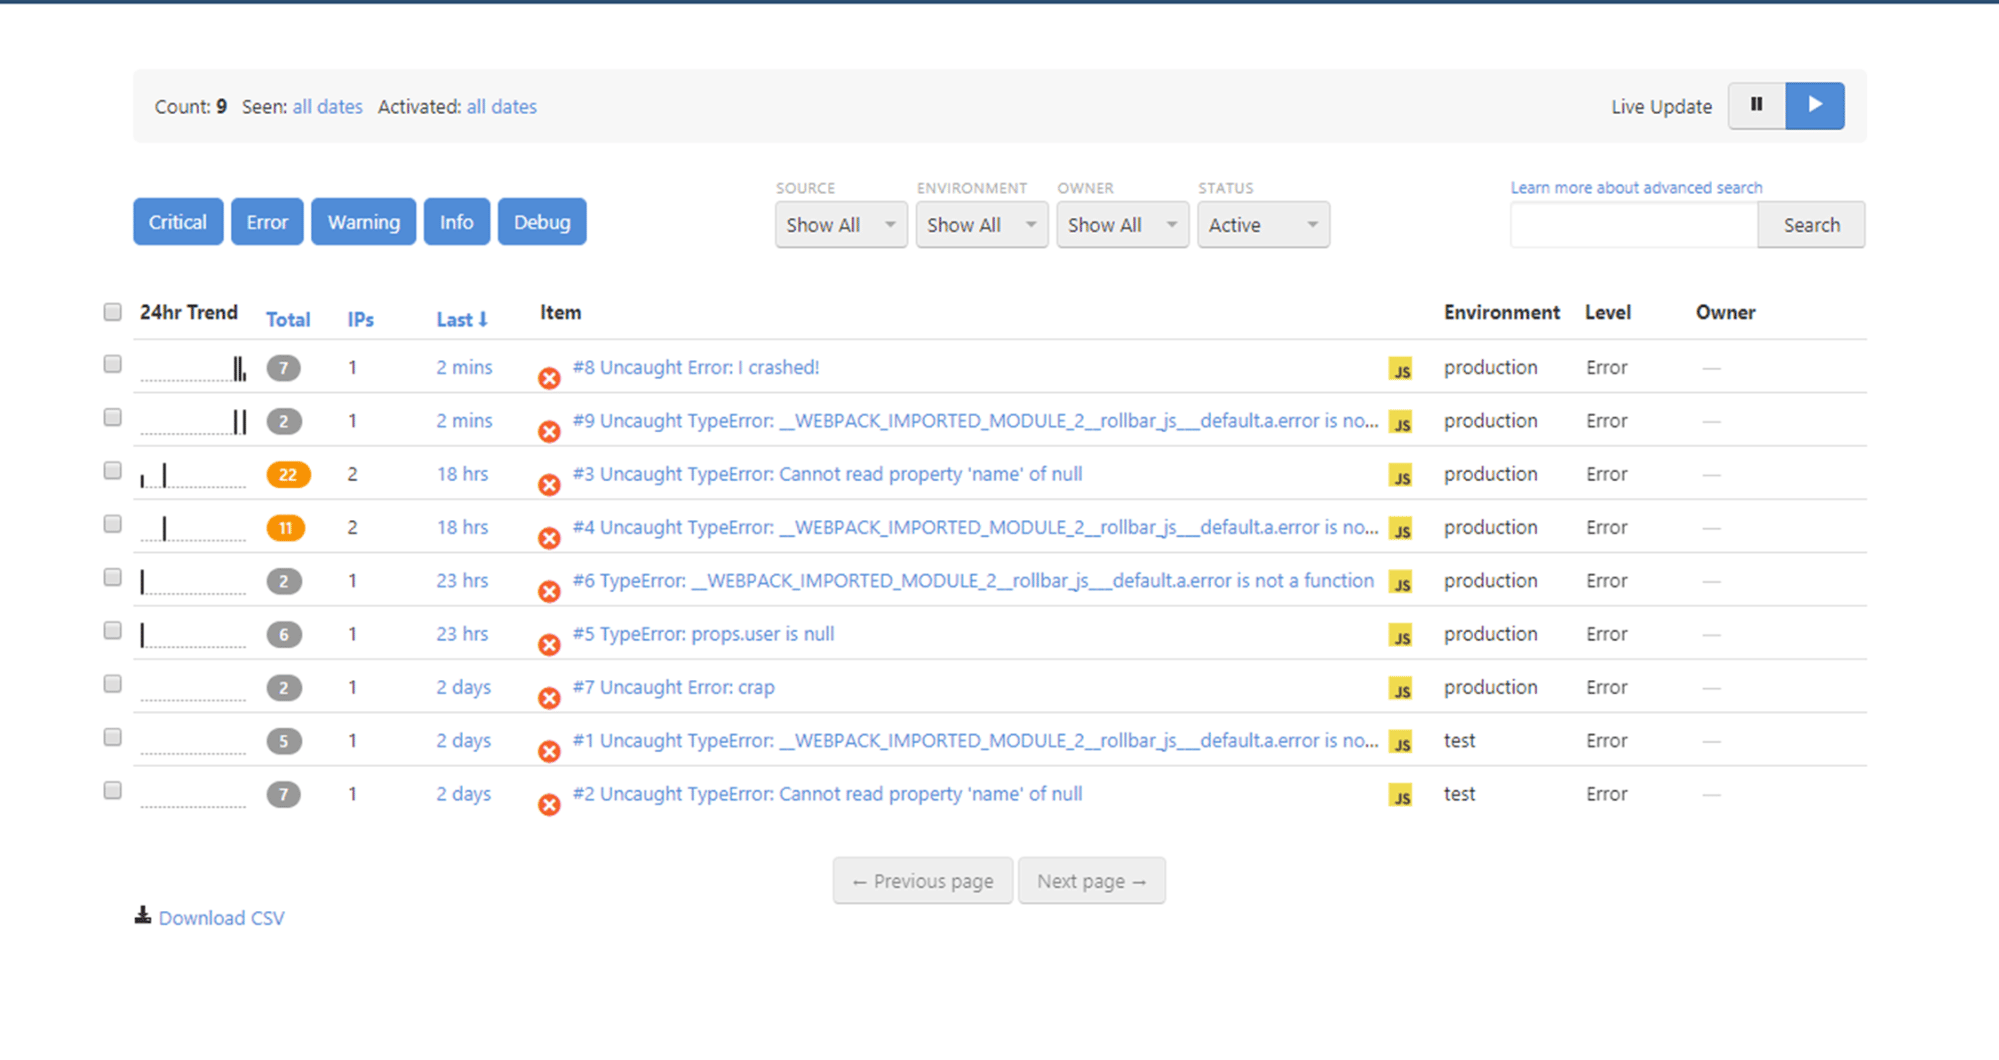
Load the page and trigger the error by clicking 5 times. Then, see what these errors look like in our public demo account’s Items page. You don’t need to sign up since this account is open to everyone.
{: .imgcaption}
Live error feed, as seen in Rollbar
- Get more details by clicking on the item near the top of the list that says “Uncaught Error: I crashed!” You can now see a traceback and telemetry recording what happened before the error occurred. This provides more context to help you find the root cause of errors.

{: .imgcaption}
Error details page, as seen in Rollbar
We highly recommend you add error boundaries to your React applications. They are very easy to use, and not only help you provide a graceful recovery, but also report those errors to Rollbar so you can quickly fix errors before they impact more users.
If you haven’t already, signup for a 14-day free trial of Rollbar and let us help you take control of React errors. 🙂